Showing posts with label freight cars. Show all posts

Tuesday, January 25, 2022

Modern-Era shelf layout: Big scenery update, trailer storage yard, ballast

 I'll have to finally come up with a better name than "tunnel hill" now that it's pretty much finished. Can't be confusing people since this is a blog titled Civil War Trains in N Scale. But it's done, with the interior of the tunnel painted and closed up from behind, and ballast along the track into the tunnel a bit. I realized after the fact that I should have added walls into the tunnel for at least the first few inches to simulate a tube. I can live with this. And again, this is all a learning experience for me. Small mistakes are fine. 


The open flat area below the tunnel will be residential lots. I'll need to build that later as I don't have enough or accurate houses right now. 


Tractor-trailer storage yard

The biggest addition this round is the landscaping and terrain, and the tractor-trailer storage yard. You can see a bunch of photos below. The first is the Susquehanna "SU-100" coming into the yard area from the "west," through the cut that separates the hill section from this new section. 

The "eastern" half of the new section features two rises in elevation to help add another break in the scenery before the approach to the downtown area and commuter station that'll come in the next few months. Here there are three tracks. The mainline to the station is in the middle. The passing/freight siding is on the bottom. And the reverse mainline is on the top and ducks behind the hill. 

Here's a look at the whole trailer yard. Once I get some actual trailers, it'll look good. There was an issue on my first attempt, however, as I used Woodland Scenics gravel for the lot surface. Those rocks were far too large. You can see some of them popping up from underneath the current surface. For this I used the WS fine ballast. It look almost perfect as a gravel lot surface. I plan to hit it with a little light paint to  give the effect of the truck paths. The chain-link fence adds to the little details that make a huge difference. 

I'll need to find houses that look better than the 40-year old Plasticville stuff. But you get the idea. 

A top-down look at the railroad cut on the western approach to the yard section. At first I wasn't sure how good this looked, but now I'm starting to come around. I really need to pain the wall blue or something. 

The next post will swing back to the original mission of this blog: The American Civil War. See you then. 

Monday, December 13, 2021

Edison, NJ train show, Nov. 2021

Took the boys to their first train show, the Greenberg Train Show on Nov. 28 in Edison, NJ. I hadn't been to one in many years, decades in fact. It was a real treat and we had a great time. The Edison expo center was huge, with an entire wing dedicated to the big layouts that you can see in the photos below. The Jersey Central N-Trak club was there with an "M" shaped modular layout. It also included a module of the USS New Jersey (BB-62), which was very cool and the 10-year-old in particular loved.

The main area of the show was full of stuff to buy, which was one of the main reasons I wanted to go, to pick up some "show priced" pieces.  As you might guess, a good 60% was O scale/Lionel, but about 10% was N scale, which was still a ton of inventory to look through. We came away with several modern era freight cars, a building that could pass for Civil War era, tunnel portals, and a modern era factory/industrial building. 

The trip was a success in all ways.

The huge N scale staging yard.

USS New Jersey (BB-62).

The boys admiring the N scale layout.

This was just one part of the layout area. 

Friday, May 21, 2021

My own 'Transition Era' with new diesels and cars

 It's been a long few months since tearing up the old 2018 layout--yes, I went through with it. Part of the reasoning was that we got new Unitrack for our 6-year-old and new trains to go with it, and needed the table. So in the interest of catching up on half a year's worth of stuff, I'll start with the new purchases. 

For Christmas we got the 6-year-old this fine Atlas Susquehanna #4004 Dash 8-40B, along with a bunch of freight cars, to go with his new Unitrack. 


Here's a quick video run-by I finally got around to uploading. It runs very nicely, especially for a used engine.  Then again, I'm not used to running diesels, or any locomotives that have so many points of contact on the track. It's so nice to not worry about choppy power supply to the motor. 


The other new engine that we got was for the 6-year-old's birthday this spring. He's been wanting a passenger locomotive for a while, since we have the 25-year-old Amtrak double-deckers. The old Amtrak EMD F40PH was beyond repair--at least for me and time--so I got him a new one from KATO. It's easily the best engine I've ever run. We took it outside in March on a warm sunny day. 


That's about it for the modern additions to our collection. I also found a big, cheap lot of freight cars for the Susquehanna engine, and added another switch and more track to the tabletop layout. 

The next update will be back to Civil War era trains, as I've worked on some new cars, figures, and buildings. Stay tuned. Hopefully it won't be another five months until then. 

Tuesday, July 28, 2020

Video: Scout pulls 27 cars like a champ

Here's a short video showing the results of my recent trial with Bullfrog Snot. The Atlas 4-4-0's have gained a great reputation as strong pullers. But I wanted more. So when my younger son's 4-6-0 needed new tires, I figured this was my chance to try out BFS on the Civil War locomotives. The Scout was the trial run, and wow! It's previous record was somewhere around 17 cars pulled before any wheel slip. Now she's pulling 27 cars and could have probably hit 30 had it not been for the double curve. Check it out. Be sure to like the video and subscribe to my YouTube channel.

Monday, June 8, 2020

The 'Scout' arrives, cannons, and warehouse

It's been a very long time since the last substantive update here, so I'll give a few with photos. The pandemic has been difficult here in North Jersey. We were one of the first hot spots in the nation. Our county saw the state's first death. I've been working remotely from the office since March, though the second job remains in-person, as it's essential. That would normally be a formula to get plenty of work done on the layout, but not so much in this reality. The boys are home from school, too, meaning all our extra time is devoted to working with them and other parental duties usually reserved for only non-school hours. Still, I've managed to get a few things done.

The 'Scout'

The Scout.
I've been waiting a long time to finally dive in and re-letter an engine. The PRR 1510 was the first candidate since I already painted over its old letters and numbers. Now it's the locomotive Scout, and I must say it looks very handsome in its new digs. I don't believe there's a prototype photo for Scout, so it's really up to the modeler with this one.

It retains pretty much everything from before, including the Rogers style smokestack and strap iron cowcatcher. I did add another coat of bright red paint to the cowcatcher to better align with the nameplate and tender letter accent color. Needs a little more detail work, but for now it's a great improvement. Next up will be one of the B&O twins.

Bring up the guns! And new warehouse.

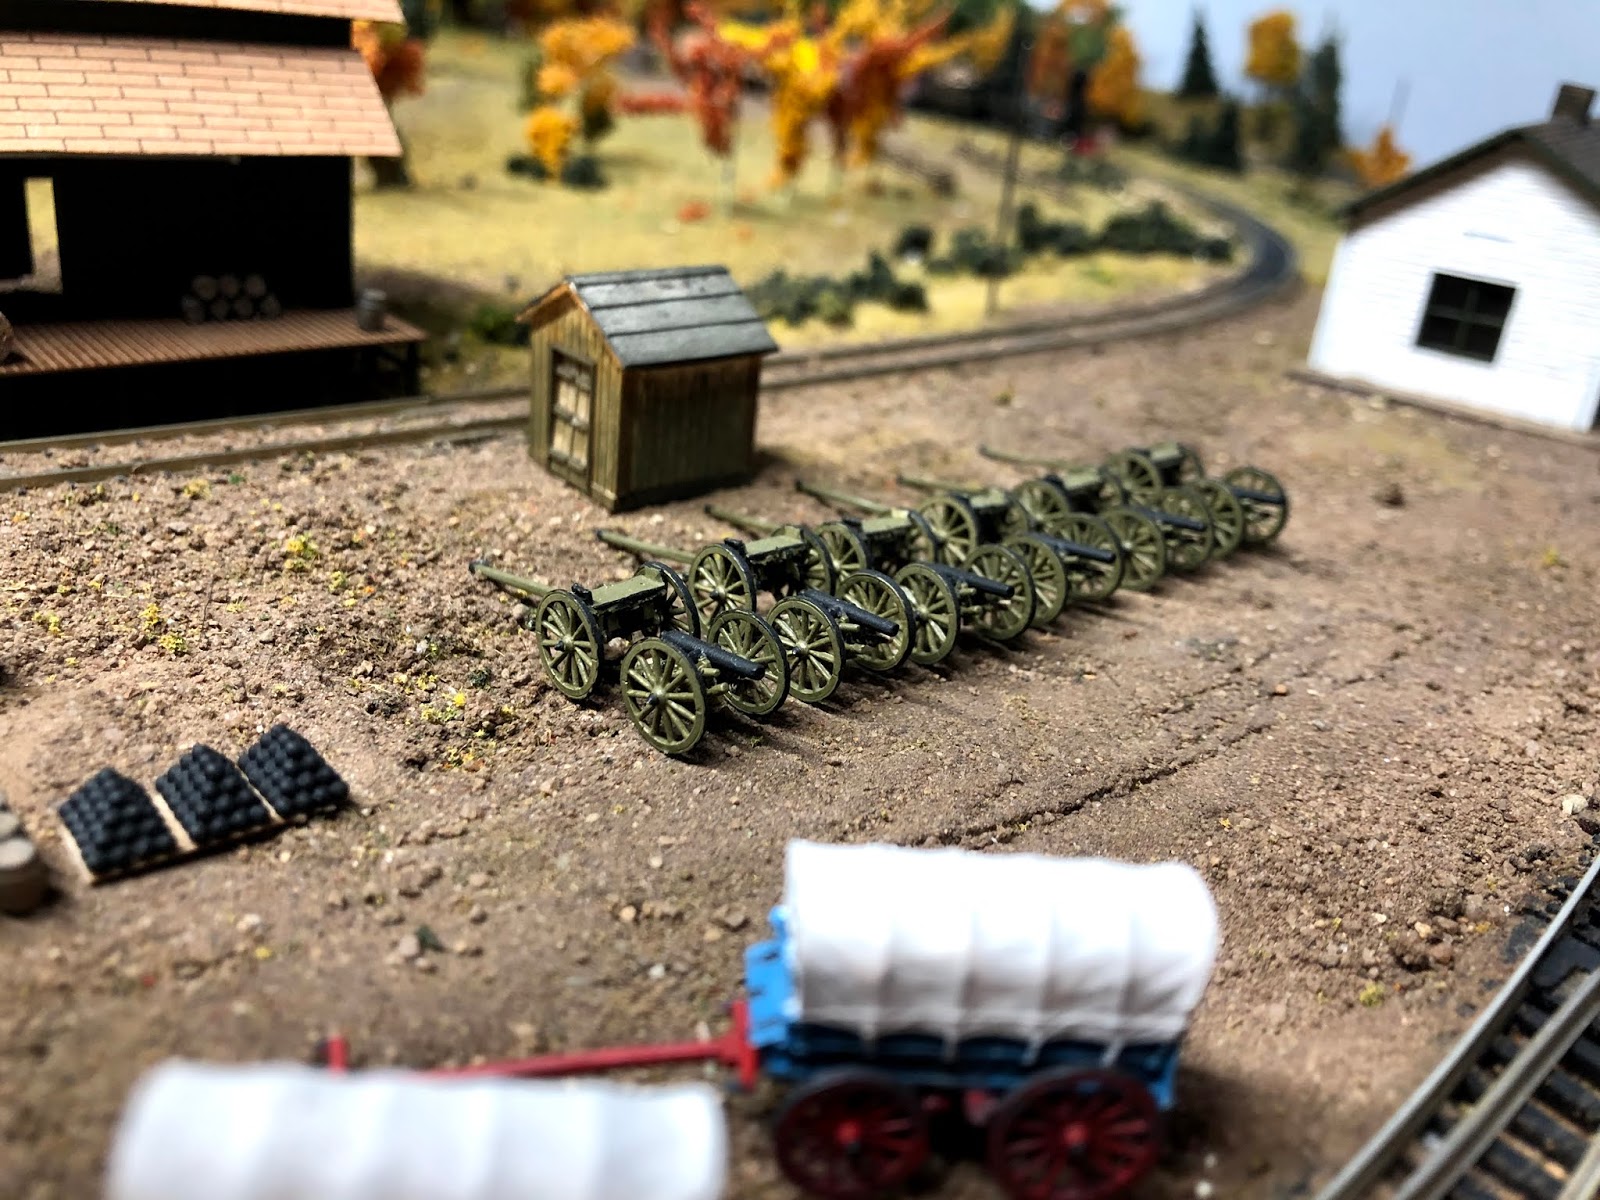
In my effort to avoid doing difficult track work or layout redesigns, I've focused on fleshing out the scenery and miniatures. This round brought six 3-inch ordnance rifles and caissons, three barbette rifles and platforms, and three stacks of cannonballs.

I thought I took some closeups of the barbette guns, but will have to come back with those later. Right now I have no place for them on the layout, but there is a photo of those guns in Alexandria guarding the port. They're definitely for use in prepared fortifications. I don't have anything like that on the current layout. If I make any major changes to it, maybe I'll add some kind of fort. Otherwise, these guns will have to hibernate until I can build the new layout next year or the year after.

The six-gun battery of 3-inch ordnance rifles are lined up in storage at the yard. This is one of the best reasons to model in N scale: volume. In most larger scales, six cannons and caissons would be a major expense. In N scale, this entire battery cost less than $100.

At first I was going to use the Parrott Rifle barrels, but decided to use the 3-inch ordnance since they were far more common during the Civil War.

In the background, you'll see a small coal shed kit I picked up, too. With a little weathering, it's the kind of building that adds necessary detail and depth. 

Probably should've cropped this photo better, but it is what it is. The new warehouse is the Micro-Trains Grain Co-Op kit. It has all the right lines for a structure of the Civil War era. And with a sharp coat of dark green paint with white trim, it fits very nicely. It's also the first two-story building on the layout.

I liked this one so much, I bought another a few weeks later super cheap on eBay. I obviously can't paint it the same color as this one. I'm still working out what I want to do there. Also under consideration is a bit of a modification to make them look a little more different, but again, still thinking about it.

The USMRR Armored Train Set

Below you'll see a couple photos of the U.S.M.R.R. Armored Train set from Micro-Trains Civil War Era line. This arrived a while back, but after I took a break from posting. So with all the catching up, I wanted to make sure these got into this post. The set is very nice, as is nearly all of MTL's stuff.

However, I'm a little disappointed in a few things. The first is that they included a conductor car / caboose, when a standard box car would've likely been the better fit. Next, the armored cars are decently detailed, but not as much as I'd hoped. A little weathering will go a long, long way with these. Lastly, the two Dictator mortars are nothing but plastic, when I was expecting either GHQ-quality or similar. The bores don't even extend far enough into the miniature so you can't see where it ends. They look very toy-like, rather than model quality I've come to expect from MTL. But overall I have no regret purchasing the armored train set. It'll go very well in a vignette on the layout somewhere.


Friday, February 28, 2020

A Ventilated Boxcar tradeoff

Finally got around to taking a photo of the ventilated boxcar I've mentioned for months. It's a 3D print from Mark Watson, based on an 1872 Virginia & Truckee prototype. So really, it's not correct for the time and place I'm modeling, but I think it really helps add variety to the rolling stock.

The tradeoff here is worth it.

Wednesday, January 29, 2020

Micro-Trains' new Civil War armored set

Well, well. Isn't this a pleasant surprise. Micro-Trains Line announced that it will be releasing a new set in its Civil War Era line: a U.S. Military Railroad Armored 4-pack! It's set to ship in March. I'm very tempted to preorder this one, since they're always limited runs of these things.

Something new and different from MTL!
To be honest, I wasn't expecting anything like this from MTL's CWE line. For years now they've been simply releasing the same boxcar-flatcar-caboose models, just with different livery. Frankly, it's getting worn out. I even asked them a while back if they were exploring doing a USMRR passenger car run. They said no, but deep down I've been hopeful. This new armored set gives me more optimism that MTL is open to more variety in its Civil War offerings. I'd also like to see some stock/cattle cars. There were plenty of them rolling down the rails during the war. 

My only--minor--complaint about this set is that they included a conductor car/caboose. A standard boxcar would have been more appropriate. But I'm not letting that dilute the excitement about this newest release. 

Thursday, April 11, 2019

Weathering the freight cars and more photos

Once the decals were done and the Dullcote applied, the freight cars looked fantastic. But they still looked like the toys they are. I figured weathering was in order. As with almost everything I do here, I didn't use a standard weathering technique. In fact, I don't really think I'd even call what I did a "technique," but more of a "whatever makes the cars look dirty." So I whipped up some dirty-looking paint and chose a frayed brush. Using very little, thinned paint and wiping the brush so there was only a light coating on the bristles, I went to town. You can see some of the results below, along with some of the unweathered cars I still have to do.


The last one was something I decided to do last minute. Using two conductor's cars, I converted them into boxcars. The side ladders were shaved off (not the cleanest work, but it is what it is) and the window frames and glass knocked out. The paint is just Testors tan. I'm going to use black lettering, since I haven't used any so far. 

Flatcar Decks


And what's that you ask, "hey, are those flatcar decks weathered to look like wood?" Yes, yes they are! One of the most noticeably toy-like features of all the freight cars was the flatcar decks painted the same color as the rest of it. That had to go. So I looked up what colors to use, and to my surprise it was a white base with black over it. I think they turned out well, but could use a little more black. 


Humans!


Finally, you'll notice the soldiers. A few weeks ago I remembered I had them from a looong time ago, back when I was reenacting. It reminded me of how much time I used to have as a kid. Anyway, it turns out they're just a bit too big (15mm?) for N scale. Such a shame, because I have about a dozen or so of them painted and would've looked good on the layout. It's a huge difference to see people, not just trains. I have some track workers on order and should be here this week. 

Some Photos


I think I like the second one better. 


Monday, March 25, 2019

U.S.M.R.R. Passenger Coaches

I'm working on repainting and lettering two of the Bachmann passenger coaches. The Microscale decals were supposed to arrive Friday, but they were delayed in the Teterboro USPS distribution center for four (!) days. They were finally delivered around noon today. Not sure if I'll have time before the weekend to try them out. In hindsight, it's good they were delayed. The paint on the coaches will definitely be dry, and I also had some time to get the boxcars and some flatcars a little more detailed. More on those in the next post.

Here's a look at the Bachmann cars. The tan color looks good. The old numbers in the middle still show through. I should have scratched them off before I started painting. That's a bad mistake and I'm kicking myself for not catching it.


The medium brown color along the roofline is just a placeholder. I need to get some darker brown for that, and mask it off so the line is cleaner. I'm also going to use the darker brown to border the windows and other trim.

Turns out I'm not going to use a dark color for the trim work. The decals from Microscale only have the passenger lettering "United States Military Rail Roads" in dark/black, not the white or gold they mention in the paperwork.


That's a pretty big disappointment, since every photo I've seen from the war shows light lettering on dark backgrounds. But I don't have much of a choice here. I'll have to paint the top border in the light tan, and use the dark brown for just the trim work around the car. (Update: You can see the finished USMRR passenger car here.)

To The Libraries


As you'd expect, much of the U.S.M.R.R.'s operations during the Civil War focused on the movement of freight to the armies in the field. When the army itself needed to move its men, they walked. Transporting men by rail was almost completely out of the question—almost. We know this wasn't always forbidden, as the simple existence of photos showing passenger coaches in operation on military roads proves it.

Looking northeast
Looking northwest
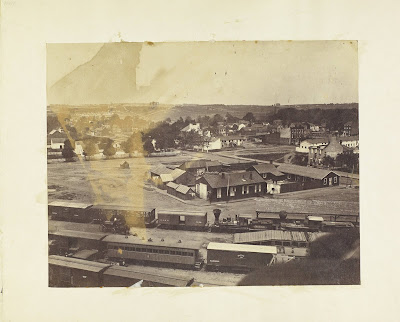
Here are two images from The Huntington Library Civil War collection. Of all the photos I've seen of railroads during the Civil War, these two show an unmatched variety of rolling stock. They appear to have been taken the same day. But I hesitate to say how close together on the same day. More on that in a moment. First...

Passenger Coaches


In the two photos here, there are five passenger coaches, all lettered for the U.S.M.R.R. I can't exactly make out what is in the center of the cars, but it appears to be a number within a shield or something. There's another photo (third photo in this post) by Andrew J. Russell of a train wreck cleanup crew that shows a U.S.M.R.R. 10-window passenger coach with a number in the center of its side, but not within a background shape like the ones here.

The coaches in the two Alexandria yard photos all have at least 12 windows. The coach marked "Hospital Car" in the first photo has 15 windows.

All four cars in the photo looking to the northeast also appear to be painted different colors. The sunlight is reflected noticeably different on each one. Even if they're all the same color, maybe they're different shades. The only description I've seen, over at the USMRR Aquia Line, indicates brown/tan color schemes when these cars were painted by the U.S.M.R.R. But as was the case with boxcars, I'm sure there was a mix of colors depending on the original owners of these passenger cars.

There's so much more to analyze, like the "Hospital Car" boxcar, and rear/tender lamp on the bottom left engine in the northwestern photo. In fact, all the engines in these photos look like they have been modified for yard-only use. Could be interesting to someday add these features to my layout, especially once I build a yard. That's probably for the next layout.

Full view of the Alexandria Yard


As I was finishing up this entry, I realized it would be great to get a view of the whole Alexandria Yard by combining the two photos as best I could. Take a look below.


Teleporting Boxcar?


On the surface, it appears Russell made the northeastern photo, then simply turned the camera to make the northwestern view. But look closely at the leftmost boxcar in the northeastern photo: #1307.

You can see it has been lettered and numbered in a sans serif font; the numbers look hand painted and not stenciled. The brake wheel is above the roofline, with a plank down the middle.

Now look at the northwestern photo in the bottom left corner. #1307! Same font. Same roof. Is it the same car? It's not impossible that the car was moved in the yard between the northeastern and northwestern photo. The track on this side of the loading dock is clear in both photos, meaning the car could've been pulled out of that line and moved into the closest track in the northwestern photo in a mater of minutes. Adding to the mystery is that the spot in the northwestern photo where the boxcar was in the northeastern photo is blocked by whatever is in the shot. We'll never know the truth!

Monday, March 18, 2019

Gondola car, barrels, and a water tower

Most of the time, I feel like I'm not doing enough on the layout because I can't do major things like replacing the track or going to DCC. But then I realize this is all what modeling is about: the little things. So I did two little things this weekend. Took about an hour and a half over two days.

Water tower


It's shocking how little there is available in the way of Civil War era structures. All the Micro-Trains buildings and accessories were sold out long ago during their short run. So scratch building is sometimes all I can do. What's more shocking is that my steam trains layout did not have a water tower! I gathered up all the leftover wood from the buildings and cobbled together something resembling the water tower in the widely-seen photo of the Gen. J. C. Robinson in front of the structure. You can see the original below.

https://www.loc.gov/item/2018666647/

Gondola car


Variety was lacking with the freight cars. And I don't have a ton of interesting loads to use with the flat cars. There are only so many times I can use the water tanks loads before it looks bad. I ordered a set of 48 wood barrels. They're painted plastic, but look really good. The problem is that they're really light. The slightest jolt will send them toppling over. I don't want to glue them down, at least not yet. The only solution was to build sides for a flat car, making a gondola car. I recall seeing a photo of it from the war, but I can't find it now. If I do, I'll add it to this post.

Like the water tower, I used leftover wood from the kits. I have to say, it turned out really well. The spacing of the posts could be better, but for the first attempt it'll do just fine. Here are the two newest additions to the layout, along with the depot I finally painted.

Could've been worse. I'll keep practicing.

Finally looks like something other than a laser cut wood kit.

Friday, March 15, 2019

Balloon stacks for the Atlas 4-4-0!

Cue the Hallelujah Chorus, folks!

Presenting the biggest event in N Scale Civil War trains since the original Atlas/MTL run. Eric Cox of Panamint Models has posted his 3D printed Smokestacks and Cowcatchers for Civil War era locomotives.

This all came from me asking him if he would work up some designs. Turned out he had some already but never put them out because the print quality back then wasn't what it was now. I got to order the first public printing, and I got to tell you, they're friggin' incredible!


It completely changes the look and feel of the Atlas engines, which suffered from the blatant "this 1870s engine is good enough for Civil War modeling." Now, not only with the variety of balloon stacks from Eric, but the horizontal cowcatchers, these locomotives scream "1860." You can check out each of them below. In general, they're based on Rogers smokestacks, but will look great as Mason or Cooke engines, too.

I noticed they sit a little high on the post rising from the Atlas engine body. So what I did for the Rogers style stack is file out the inside of the base a little. That allows it to "hug" around the post a little more, lowering the distance between the bottom of the balloon base and the boiler body. I'm still working on it. Eric thinks they're a little too big still, and if he took them down another 5-10%, I'd be okay with that. Only the two bigger stacks should be taken down, if at all. The smaller one looks good as it is.


Catching up with rolling stock, layout and more

Much of what you read in this post is a condensed version of what I posted over on Trainboard.com. I've decided to move things over here from there, since I'm less in the discussion phase and more in the narrative phase of the project.

June 2018

Dropped $70 on an Atlas PRR 1610 from eBay. Not sure how I managed to find that one, but it's a steal and I'm super happy about it. I also ordered an Atlas Gen. Haupt from Streamlined Backshop with a DCC install that looks great. One hangup on that one, though... I don't have a DCC layout. But figured I'd get it installed now. I just can't really use it on the layout. The final item in this batch is a set of four Bachmann W&ARR boxcars. The boys were naturally excited about those since they're "from the movie."


The Arnold Coaches episode was a short one, but a learning experience. In need of passenger cars, I saw a set of old W&ARR coaches on eBay. I got them for something like $75. It felt like a bit much, but it was early in my education about all this and I was getting anxious. After some testing, I figured out why they weren't worth the time, effort, or money. 

From the time: 
There was a bit of trouble, I think due to the plastic wheels. But I haven’t investigated thoroughly yet. They don’t spin as freely as I’d like. Would love to replace them with new ones. But they are attached using pins that are molded into the bed, not the normal kingpins I’m used to. Hmm... 
Otherwise they’re in great condition. Almost no visible wear. And they’re *heavy*, which I was a little worried about. But both the Bachmann’s pulled all three with only minor slipping. 

Fast forward a few days... 
I'm returning the Arnold passenger cars. Too much work to retrofit them. Will look into Bachmann or another maker for passenger cars. There are many on eBay. 

Mid-month, I ran out of money, so I started messing around with layout software for what I imagined to be my "dream layout":
Work on the actual locomotives has been slow, as I only have about an hour at night available.
I cleaned up the wheels of the Gen. Haupt, and its pickup is already improved. But I think much of the pickup issues has to do with the track being 20+ yrs old. Some of the track is actually 30-40 yrs old. Still, considering, I've had only one or two stalls during a complete runaround of the 3'x3' layout I'm using right now. I also didn't solder anything or take any of the care I'm supposed to while laying track. I used fine sandpaper on top of the rails and cleaned them with alcohol, which cleared up 80% of the issues. I'm going to add more weight to them in the cabs and front of the tenders. I'll need to cover up the decoder anyway, so it should work out nicely.   
In the meantime, I got antsy and way ahead of myself, so I did a draft layout for the room I'm going to use. It'll be a shelf layout and the room structure already accommodates that. You'll see when I get photos posted. But for now, here's what will eventually become a Civil War single-track railroad, loosely based on the W&ARR. I plan to use Peco C55, which I know is a little expensive, but I want to be able to run my old pizza cutters on it, too. Plus, I read the switches are better. I'm going to build this in DCC, so I'll also need the auto-reversers for the reverse loops. All of this is months, if not a year away, so I don't expect to update anything about the layout for a good long while. 
Yeah, it'll be more than a year away. No chance that I'll get something like that done by this June.

Finally got smart and tracked down some Micro-Trains Civil War era cars. Added five more freight cars. Found them cheap. To be honest, I was shocked to find them at all. But one thing I still can’t seem to find more of is the regular boxcar. The converted house cars will do just fine for now.  

I also wanted to see how well the Atlas engines pulled. 

So I coupled up an 11-car train, which included the four heavier Bachmann W&ARR boxcars. And aside from a little hesitation for a moment, the two Atlas had no problems.

Here's the PRR No. 1510 pulling 11 freight cars. I blame the moment of hesitation on bad track/pickup. This engine was running on pulse setting using a Throttlepack 501 N, but I hope the Tech 7 I ordered will help with the slow speed control. The U.S.M.R.R. Gen. Haupt (which has a decoder installed, the PRR doesn't) doesn't react to the pulse setting at all, which is bothersome since the Atlas engines on the full setting start moving at about 40 mph. Not realistic at all. The Bachmann engines, surprisingly, have much better slow speed reaction with the 501. Not sure if that's a motor thing. 


I got an order of MTL wood frame trucks and the simulated link-and-pin couplers. The plan was to convert all the Bachmann CWE cars, with enough leftover trucks/couplers in case I ever need more. 

I recall seeing the trucks and couplers advertised as being compatible with the Bachmann cars, but maybe I misread it. When I tried to simply swap out the trucks, they didn't fit over the existing frame. 

Instead of drilling out the MTL trucks--which would thin them out and harm the structural integrity--I took a hand file to shave down the screw holes on one of my old cars as a test. I went all the way down to the base, but as you can see in the second photo, it still wasn't enough! The car still rides high compared to the stock Bachmann car and the MTL car. 

Before I proceed with a dremel tool to get these down to the right height, let me ask: Is there another way? Or is this normal kind of stuff when adapting stock items to my needs?  
The first pic is of the old Bachmann frame that I filed (top) and the stock/new Bachmann frame (bottom) to compare. 

July 2018

So I guess by the end of June it was too much to just keep running trains on the wood table. I needed something more. Here's the update with a few photos. It was *really* hot out during the days I was building this thing. I had to do it outside because the boys wanted to be outside in the sprinkler and pool. 
Couple updates. While I’m not nearly ready to build the big one, I’ve been antsy to get something done that can run trains. So I got some foam boards, plaster cloth, cork, and a small wood kit depot the other day, and started a 3x3 layout. Nothing specific. Rural overall and generic era so we can run both the 19th and 20th century trains. 
Please don’t have too much fun at my expense. I’m aware of all the mistakes I made. The gap between rails in the last two pics is pretty glaring. 
But even with the poor pickup on those engines, the gaps didn’t cause a problem. I cleaned up all the old track—30-yr old code 80–and bought new rail joiners. It’s surprisingly solid. I actually forgot to take a wide pic of the whole thing as it stands now. Will do that later. I just need to start working on the landscaping and a few more buildings. The reason I went with the large rolls of cork is because I don’t want the track raised too high above the surrounding terrain. I want that “old track” look.  
   

Late-July 2018

Once my 3-year-old moved into the same room as the 7-year-old, it freed us to move out of the basement bedroom. 

That means we have a play/rec room down there now. 
Moved around some rooms in the house, meaning I finally have a room for the layout!  
So I got paint and scenery, and went to work. I’m further along than the final photo shows, but I’ll have another update soon. I tell ya, seeing the ground cover going down really boosts the morale. 
I also picked up a bunch of 1860 passenger cars and another engine for super cheap. 
They need some work, and I ordered all new trucks from shapeways. Getting them fitted with the new trucks and link and pin will look great.
 
The ballast didn’t turn out how I wanted. I’m going to make the rest of it look more like a dirt/ballast mix, as ballasting back then isn’t what we think of now. 


August 2018

Update and video time! 

The Atlas 4-4-0 P.R.R. 1610 pulling a load of 13 freight cars, a mix of U.S. Military R.R., Manassas Gap R.R., and Pennsylvania R.R. (latest editions! Should have a Georgia R.R. arriving today). The key to a smoother run is weight. I recently added about 1.5 oz of tungsten putty to places like the pilot truck, cab, and tender under the wood load. There's only one or two spots it hesitates, but that's probably because I didn't clean the track in over a week. The layout is progressing along nicely, albeit slowly. I'm only showing the parts of the layout that have (at least some) scenery, and all of it will be improving on a continuous basis. This accounts for about 3 months of work.


October 2018

Geez, time really got away from me. School and football started up and suddenly it’s October. Anyway, here’s a quick landscape update. One more corner done. A little grove and a bunch of ground cover. Need more trees though. Pines would be good. 


And I managed to get my hands on eight (!) of those undecorated MTL boxcars. I painted four so far w a rust color. Hand painting, not spraying. I figure the real things weren’t sprayed so this would work out. The first coat looks so good I may not do a second. Will need to order decals. 

Also, I’m debating what color to do the second set of four. I think the slate gray is generic enough for this period that it could work with almost any line.


The blue-gray color looks pretty nice on the boxcars. Adds some needed variety to the roster. The rust color on the other boxcars almost looks like the iron boxcars used by the B&O during this era. Now I just need to find some stock cars or other kind of ventilated boxcars. I haven't ordered decals yet, so they remain plain. I forgot to paint and install the brake wheels to each of the new boxcars. Have to get around to that, too. 


But the biggest news on the scenery front is that I finally got around to the water. It was scary going in, since I've never done anything like this before. But now I'm really happy with how it turned out. Used rocks from the back yard to make the banks and shore line. Once I finally break down and buy some dam trees (they really add up $$) the whole center of the layout will be pretty impressive. 

Now the story continues on the main feed of this blog. Thanks for reading...